
Soups & Stews
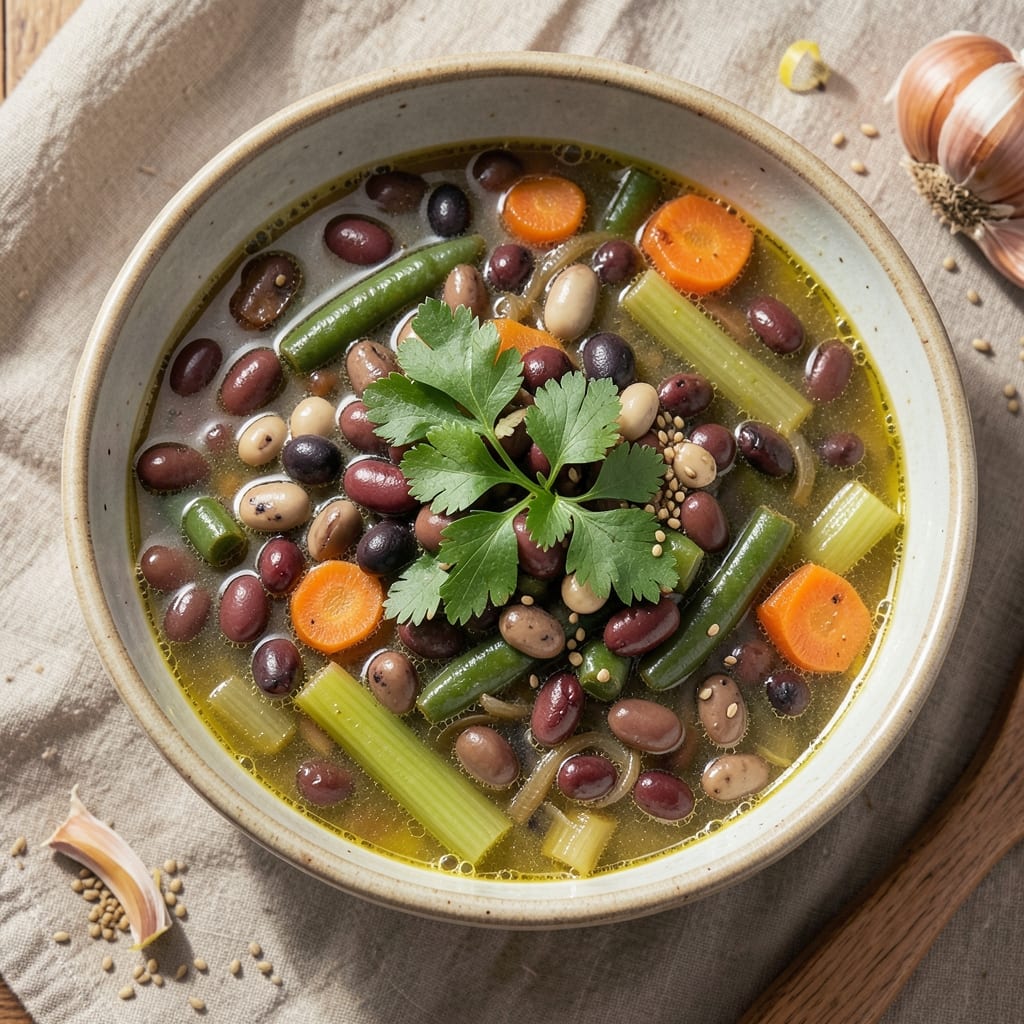
This 5 bean soup bag recipe transforms a simple pantry staple into a hearty, protein-rich meal that's perfect for chilly evenings or meal prep. The beauty of this dish lies in its simplicity—just one bag of dried beans, a few pantry staples, and about an hour of simmering time. I developed this recipe after realizing how often dried beans go underutilized, and it’s become a staple in my weekly rotation for its affordability and nutritional punch.
The key to a flavorful 5 bean soup is balancing the broth with aromatic vegetables like onions, garlic, and carrots, along with herbs such as thyme and bay leaves. These ingredients infuse the beans with depth, while a splash of vinegar or lemon juice brightens the finished dish. The beans soften as they simmer, absorbing the broth and developing a tender, satisfying texture that’s both comforting and nutritious.
By the time you’re done, you’ll have a warm, protein-packed soup that’s rich in fiber, plant-based protein, and essential vitamins. The flavors meld beautifully, creating a dish that’s hearty enough for a main course but versatile enough to pair with crusty bread or a simple green salad. It’s the kind of meal that feels indulgent yet wholesome, perfect for those who want nourishing food without the fuss.
This recipe is also incredibly adaptable—add smoked paprika for a touch of warmth, or stir in some hot sauce for a spicy kick. The leftovers keep well in the fridge for up to five days, making it an ideal option for meal prepping. Let’s get started on creating this pantry-to-pot masterpiece.
Ingredients for 5 bean soup bag
Pantry staples meet protein-packed simplicity in this hearty five bean soup recipe.
| Ingredient | Amount | Notes |
|---|---|---|
| Dried Five Bean Mix 🌱 | 1 lb | Pre-rinsed to remove debris |
| Yellow Onion 🧅 | 1 whole | Diced into 1/4-inch pieces |
| Carrots 🥕 | 3 medium | Peeled and sliced into 1/4-inch rounds |
| Garlic Cloves 🧄 | 4 cloves | Minced for aromatic depth |
| Celery Stalks 🥬 | 2 whole | Diced into 1/4-inch pieces |
| Vegetable Broth 💧 | 6 cups | Low-sodium preferred |
| Tomato Paste 🍅 | 2 tbsp | Smooth texture preferred |
| Dried Thyme 🌿 | 1 tsp | Or 1 tbsp fresh thyme |
| Bay Leaves 🍃 | 2 whole | Removed before serving |
| Cumin Seeds 🌶️ | ½ tsp | Toasted lightly for flavor |
| Apple Cider Vinegar 🍎 | 1 tbsp | Brightens the finished soup |
| Salt 🧂 | 1 ½ tsp | Adjust to taste |
| Black Pepper 🌶️ | ½ tsp | Freshly ground preferred |
| Extra-Virgin Olive Oil 🫒 | 1 tbsp | For sautéing vegetables |
The dried bean mix is the foundation—look for a high-quality, organic blend from Whole Foods or Trader Joe's for optimal texture and flavor. Costco often carries large bags at a better price per pound, but any reputable grocery store's dried beans will work. Rinse them well before cooking to remove any dust or debris, which can make the soup cloudy. The vegetables—onion, carrot, celery—form the aromatic base, so don't skimp on freshness. Yellow onions with a slight sweetness and crisp carrots ensure the best flavor profile. For the broth, low-sodium options like Pacific Foods or Imagine are ideal—they allow you to control the seasoning.
No dried thyme? Fresh thyme leaves at one-third the amount work beautifully, and they add a vibrant aroma. Out of cumin seeds? Ground cumin at half the amount is a fine substitute, though toasted seeds add a subtle nuttiness that's hard to replicate. Vegetable broth missing? Water with 1 tsp soy sauce or miso paste adds depth, though it won't match the complexity of a good broth. The apple cider vinegar is non-negotiable for brightness—substitute lemon juice if that's what you have, but vinegar's tang is essential here. For the tomato paste, squeeze tubes from Trader Joe's are perfect—they're convenient and last months in the pantry.
This soup tastes even better the next day as flavors meld. Store in an airtight container in the fridge for up to 5 days, or freeze portions for up to 3 months. I always double the batch—one for dinner, one for lunches. The beans soften further when reheated, so add a splash of water or broth if it thickens too much. For meal prep, portion into glass containers—they keep flavors fresh longer than plastic. The leftovers reheat beautifully on the stove or in the microwave, making this a perfect make-ahead dish.
Why You'll Love This Recipe
- No-Soaking Required: I’ll be real—this recipe changed my life when I realized I could skip soaking the beans. Just toss that dried five-bean mix into boiling water with the onion, carrots, and celery, and let them do their thing. Ten minutes later, you’ve got a pot of soup that tastes like it simmered all day.
- Umami Bomb Combo: That celery, onion, and garlic trio? It’s basically soup magic. The carrots add natural sweetness, but it’s the beans—black, kidney, pinto, whatever’s in that mix—that turn this into a flavor powerhouse. Honestly, the first time I tasted it, I grabbed another bowl.
- Meal Prep MVP: Between us, this is my go-to for busy weeks. Cook a big batch, portion it into containers, and you’ve got lunch or dinner covered for days. (Yes, even on a Tuesday night.) The flavors actually get better the next day—no sad, watery leftovers here.
- Pocketbook Hero: Dried beans are my secret weapon for stretching meals without breaking the bank. A single bag of that five-bean mix feeds four people for under $5, and you’re left with a hearty, protein-packed soup that’ll keep you full. Not the prettiest, but the taste makes up for it every time.
Step-by-step instructions for hearty five bean soup
Transform pantry staples into a rich, protein-packed soup with layers of flavor and texture.
Sauté the Aromatic Vegetable Base
Heat the 1 tablespoon extra-virgin olive oil in a large Dutch oven over medium heat. Add the 1 whole yellow onion, 3 medium carrots, 2 whole celery stalks, and 0.5 teaspoon cumin seeds. Cook for 5-6 minutes, stirring occasionally, until the vegetables soften and the cumin seeds release their warm, nutty aroma.
Here's the thing—you want the vegetables to develop a slight golden color at the edges before moving forward. This caramelization builds depth of flavor that simmers into the broth. If the oil starts to smoke, reduce the heat slightly and let it cook more slowly. Add the 4 cloves minced garlic and cook for an additional 30 seconds until fragrant—this prevents the garlic from burning, which would make the soup bitter.
Build Flavor with Tomato Paste and Herbs
Stir in the 2 tablespoons tomato paste and cook for 1-2 minutes until it darkens slightly and loses its raw taste. This step deepens the soup's color and adds a subtle sweetness that balances the earthy beans. Add the 1 teaspoon dried thyme, 2 whole bay leaves, 1.5 teaspoons salt, and 0.5 teaspoon black pepper, stirring to combine.
Real talk: the tomato paste and herbs create the flavor foundation. Don't rush this step—let the spices bloom for 30 seconds to release their essential oils. This ensures every spoonful of soup carries that complex, aromatic profile we're after.
Hydrate and Simmer the Beans
Pour in the 6 cups vegetable broth and bring the mixture to a gentle boil. Add the 1 pound dried five bean mix and the 1 tablespoon apple cider vinegar. Reduce heat to low and let it simmer uncovered for 1 hour, stirring occasionally. This slow cook time allows the beans to soften evenly while maintaining their texture.
I know it seems like a long time, but patience is key here. The beans need this gradual hydration to become tender without falling apart. After 45 minutes, check the beans with a fork—they should be noticeably softer but still hold their shape. If they're breaking down too quickly, reduce the heat slightly to prevent mushiness.
Finish and Adjust the Seasoning
Remove the 2 whole bay leaves and taste the soup. Adjust the seasoning with additional salt or pepper as needed. The apple cider vinegar should brighten the flavors, but if the soup tastes flat, add another ½ teaspoon vinegar. For extra richness, stir in 1 tablespoon butter or a splash of heavy cream.
This is the moment that matters: let the soup sit off heat for 5 minutes before serving. This resting period allows the flavors to meld and the beans to fully absorb the broth, resulting in a soup that's perfectly balanced in every bite. Serve warm with crusty bread to soak up every last drop of that hearty bean broth.
Pro Tips For Making 5 Bean Soup Bag
- SOAK BEANS OVERNIGHT: I learned this the hard way—skipping the soak leaves beans tough no matter how long you simmer. Use a big bowl, cover with water by at least 3 inches, and let them sit 8+ hours. The next morning, drain and rinse before cooking; they’ll soften faster and absorb flavors better.
- CHOP VEGETABLES UNIFORM: Onions, carrots, and celery should be cut into ¼-inch dice—same size as your beans. Uneven pieces mean some veggies turn to mush while others stay crunchy. A sharp knife and steady hand make this quicker than you’d think.
- SIMMER LOW AND COVERED: After bringing the soup to a boil, drop the heat to a gentle simmer and keep the lid on. High heat makes beans split and the broth cloudy. Low and slow (about 1.5 hours) ensures tender beans and a cleaner broth—no one wants mushy beans in their soup bag.
- ADD AROMATICS LAST: Toss in garlic and celery with the beans in the final 15 minutes of cooking. This keeps their flavors bright instead of bitter. If you add them too early, they’ll turn to paste and ruin the texture—trust me, you’ll taste the difference.
Pro cooking tips for 5 bean soup bag
Bean Prep Matters
Always rinse your 1 lb dried bean mix thoroughly before cooking to remove dust and debris. I swear by this step—it prevents cloudy soup and ensures cleaner flavors. For best results, soak the beans overnight in 4 cups water with 1 tsp salt, then drain before cooking. This reduces simmering time by 30-45 minutes and creates a creamier texture. If you're short on time, just rinse and cook as directed—the beans will still soften beautifully, though they may take the full 1 hour. 💡
Low-and-Slow Wins
Never rush the simmering process. Maintain a gentle bubble at the surface—this means your heat should be low to medium-low. I've learned the hard way that high heat makes beans mushy and broth cloudy. After 45 minutes, check for doneness by tasting a bean. If it's still firm, keep simmering uncovered. The beans will continue softening even off the heat, so don't overcook. A Dutch oven is ideal for even heat distribution. 🔥
Broth Balance Secrets
Use low-sodium vegetable broth to control seasoning—high-sodium versions make it impossible to adjust flavors properly. For extra depth, add 1 tsp soy sauce or ½ tsp miso paste when pouring in the broth. The apple cider vinegar is non-negotiable—it brightens the earthy beans. If your soup tastes flat after simmering, add another ½ tsp vinegar or a pinch of smoked paprika for warmth. Taste as you go! ✨
Herb Infusion Tricks
Toast your cumin seeds in the oil for 30 seconds before adding vegetables—they'll release their nutty aroma. For fresh thyme, use 1 tbsp leaves instead of dried. I also like adding 1 sprig rosemary during simmering for an herbal note.
Texture Control
If your beans become too soft, reduce heat immediately and add ½ cup water to prevent sticking. For creamier soup, mash ¼ of the beans with a fork after simmering. I sometimes reserve ½ cup broth, blend it with 1 tbsp olive oil, then stir it back in for richness. The key is balance—you want beans that hold their shape but still break down slightly for that hearty texture. 💪
Make-Ahead Magic
This soup tastes even better the next day as flavors meld. Store in an airtight container in the fridge for up to 5 days. For freezing, portion into glass containers and leave 1 inch headspace—beans expand slightly when reheated. When reheating, add 2-3 tbsp water per serving to prevent thickening. I always double the batch—one for dinner, one for lunches. The leftovers reheat beautifully on the stove over medium heat for 5-7 minutes. ❄️
Nutrition facts
Frequently asked questions
Can I use canned beans instead of dried for this recipe?
While you can substitute canned beans, the texture and flavor won't be the same. Canned beans are pre-cooked and softer, which can make your soup too mushy. If you must use them, drain and rinse 3 (15-oz) cans of mixed beans (navy, kidney, etc.) and simmer for just 10-15 minutes to warm through. For best results, stick with dried beans—they absorb flavors better and create that hearty, satisfying texture.
How do I adjust this recipe for a pressure cooker?
Pressure cooking cuts the time dramatically! Sauté your vegetables and spices as directed, then add the broth, beans, and vinegar. Seal the lid and cook on high pressure for 20 minutes. Quick-release the pressure, then let the beans sit for 5 minutes before opening. The beans should be tender but still hold their shape. This method reduces cooking time by about 45 minutes compared to stovetop simmering.
Why does my soup taste bland even after seasoning?
Blandness usually comes from one of three issues: under-seasoned broth, insufficient simmering time, or skipping the acid component. Double-check your broth—use low-sodium and add an extra ½ tsp salt if needed. Ensure beans simmered for the full 1 hour (they absorb flavors over time). Most importantly, don't skip the apple cider vinegar—it brightens the soup. If still bland, add a pinch of smoked paprika or a splash of soy sauce at the end.
Can I make this soup spicier?
For heat, add ½ tsp cayenne pepper or 1 tsp hot sauce when tasting the finished soup. For smoky depth, stir in ½ tsp chipotle powder with the tomato paste. If you love bold flavors, try ½ tsp crushed red pepper flakes during the sauté step. Remember, beans absorb heat well, so start with less and adjust to taste—you can always add more, but you can't take it out!
What's the best way to reheat leftovers?
Reheat gently to preserve texture. On the stove, warm over medium-low heat for 5-7 minutes, stirring occasionally and adding 2-3 tbsp water if it thickens too much. For microwave reheating, cover with a damp paper towel and heat in 1-minute intervals until hot. Never reheat to a boil—this can make the beans mushy. For best results, reheat only what you'll eat immediately. The soup keeps well in the fridge for 5 days!