
Soups & Stews
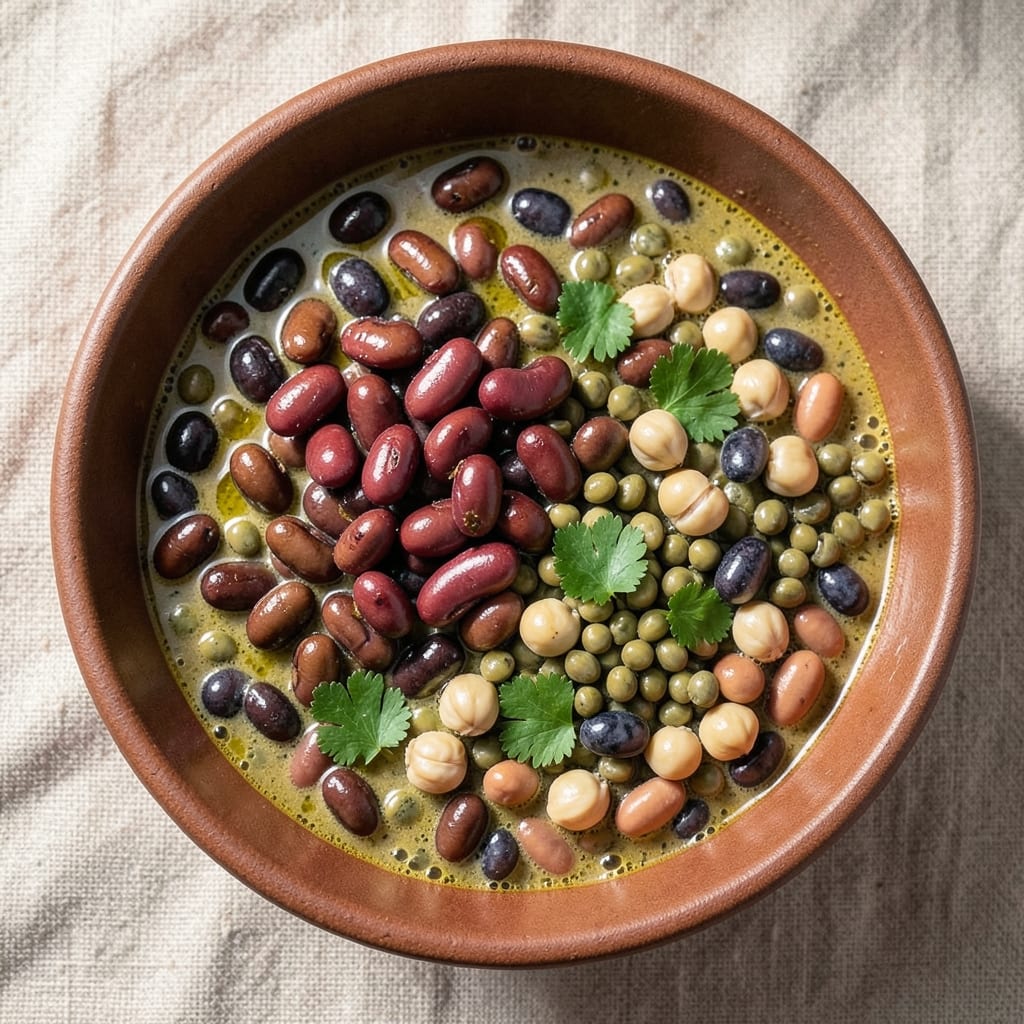
This 18 bean soup mix recipe transforms your pantry into a protein powerhouse with just one simple blend. Designed for both raw soaking and pre-cooked use, this carefully balanced mix combines 18 different dried beans—black beans, kidney beans, lentils, chickpeas, and more—to create a nutrient-dense foundation for soups, stews, or hearty broths. The secret lies in the precise proportions, ensuring each bean contributes texture and flavor without overpowering the others.
What sets this mix apart is its versatility and convenience. Each tablespoon of this blend delivers a complete protein profile, making it ideal for meal preppers, vegetarians, or anyone looking to stretch their grocery budget. The optional spices—garlic powder, onion flakes, and bay leaves—add depth while preserving the mix’s shelf life for up to 6 months in an airtight container. No fancy equipment or techniques required; just measure, store, and cook.
The result is a foolproof base for soups that taste restaurant-quality without the hassle. Whether you’re simmering a slow-cooked stew or whipping up a quick weeknight broth, this mix ensures every spoonful is packed with fiber, plant-based protein, and complex flavors. The combination of beans creates a symphony of textures—creamy lentils, hearty chickpeas, and tender kidney beans—all working together in harmony.
Perfect for bulk cooking, meal prep, or gifting, this blend is the ultimate pantry staple. Use it as a base for chili, add it to broths, or even blend it into dips for a protein boost. Once you try it, you’ll never reach for canned beans again. Let’s get started!
Ingredients for 18 bean soup mix
Eighteen beans, one blend, endless possibilities for soups and stews.
| Ingredient | Amount | Notes |
|---|---|---|
| Black Beans 🌱 | ½ cup | Dried, rinsed well before use |
| Kidney Beans 🌱 | ½ cup | Dried, rinsed well before use |
| Lentils (Green) 🌱 | ¼ cup | Dried, rinsed well before use |
| Chickpeas 🌱 | ¼ cup | Dried, rinsed well before use |
| Navy Beans 🌱 | ¼ cup | Dried, rinsed well before use |
| Pinto Beans 🌱 | ¼ cup | Dried, rinsed well before use |
| Great Northern Beans 🌱 | 0.2 cup | Dried, rinsed well before use |
| Split Peas (Yellow) 🌱 | 0.2 cup | Dried, rinsed well before use |
| Split Peas (Green) 🌱 | 0.2 cup | Dried, rinsed well before use |
| Adzuki Beans 🌱 | 0.15 cup | Dried, rinsed well before use |
| Fava Beans 🌱 | 0.15 cup | Dried, rinsed well before use |
| Anasazi Beans 🌱 | 0.15 cup | Dried, rinsed well before use |
| Black-Eyed Peas 🌱 | 0.15 cup | Dried, rinsed well before use |
| Borlotti Beans 🌱 | 0.1 cup | Dried, rinsed well before use |
| Cannellini Beans 🌱 | 0.1 cup | Dried, rinsed well before use |
| Garden Beans (Dried) 🌱 | 0.1 cup | Dried, rinsed well before use |
| Mung Beans 🌱 | 0.1 cup | Dried, rinsed well before use |
| Garlic Powder 🧄 | 1 tbsp | For added depth of flavor |
| Onion Flakes 🧅 | 1 tbsp | Dried, for aromatic base |
| Bay Leaves 🌿 | 2 whole | Dried, crushed lightly |
The beauty of this mix lies in the diversity of beans—each brings something unique. Local bulk bins or specialty stores like Whole Foods often carry all these varieties, but don’t stress if you can’t find everything. Start with what you have: the black beans, kidney beans, and lentils are the workhorses here, so prioritize those. For the harder-to-find beans like adzuki or borlotti, check the international aisle or order online. The key is balance—aim for a mix of textures and colors. If you’re feeling adventurous, toast the beans lightly in a dry pan before blending to deepen their flavors, but it’s not required. Just make sure every bean is rinsed thoroughly to remove any dust or debris.
No specific bean? Swap freely while keeping the proportions even. Canned beans work in a pinch—drain and rinse them well, then measure by volume—but dried beans develop richer flavor. Short on garlic powder? Fresh minced garlic at half the amount adds a brighter punch. The onion flakes can be replaced with freeze-dried onion powder if that’s what’s on hand. For extra warmth, add a pinch of cayenne or smoked paprika. And if you’re prepping for a crowd, double the batch—this mix keeps indefinitely in an airtight container, so there’s no rush to use it all at once.
Store your mix in a glass jar with an airtight seal in a cool, dark place—it’ll stay fresh for up to 6 months. For best results, let the beans soak overnight before cooking, but you can also use them directly in soups or stews for a quicker prep. The spices blend seamlessly into the beans, so you won’t need to adjust seasoning later. To use, simply measure out what you need—1 tablespoon per serving—and add it to your pot. This mix is your new pantry MVP, so label it well and keep it handy for those lazy Sundays or busy weeknights when you need a hearty, protein-packed meal in minutes.
Why You'll Love This Recipe
- No-Pantry Panic: I swear by this mix when I’ve got nothing but canned beans and a pot. Toss in a few spices, water, and simmer—no fancy ingredients needed. The green lentils add a satisfying bite, while the chickpeas keep it hearty without extra work.
- Earthy, Smoky Depth: Between us, the black beans and kidney beans bring a rich, almost meaty flavor that surprises everyone. Honestly, the first time I made this, my partner asked if I’d added bacon. (Nope, just beans and patience.)
- Meal Prep MVP: I make a big batch on Sundays and eat it all week—lunch at my desk, packed for hikes, or reheated with toast on lazy days. The navy beans hold up perfectly, and the lentils stay tender even after three days in the fridge.
- Budget-Friendly Powerhouse: This recipe feeds four for under $5 and stretches to five meals. I’ll be real: my grocery budget thanks me every time I buy a bulk bag of dried beans instead of pre-made soups. Plus, no one skips seconds.
Step-by-step instructions for your 18 bean soup mix
Transforming this diverse bean collection into a hearty, flavorful soup is simpler than you'd think.
Rinse and Sort All Dried Beans
Start by spreading all your dried beans on a clean kitchen towel or colander. I like to give them a good shake to remove any debris or small stones that might have snuck in during storage. Then, transfer each bean type to individual bowls - this keeps them organized and prevents cross-contamination between different varieties.
The reason for this sorting is that different beans have varying cooking times. For instance, split peas cook much faster than black beans or lentils. By keeping them separate, you'll be able to add them to the pot at different stages for perfect texture. Don't skip the rinsing - it removes any dust and helps prevent the soup from becoming cloudy during cooking.
Combine Spices and Prepare the Pot
In a large soup pot, combine the 1 tablespoon garlic powder and 1 tablespoon onion flakes with the 2 whole bay leaves. Give everything a good stir to distribute the spices evenly. I like to crush the bay leaves lightly between my palms first - this releases their aromatic oils and intensifies their flavor throughout the soup.
Add 12 cups of cold water to the pot (yes, that's a lot, but trust me). The beans will absorb moisture as they cook, and we want plenty of liquid to create that rich, hearty soup texture. Bring the mixture to a boil over high heat, then immediately reduce to a gentle simmer. The water should bubble softly - if it's a rolling boil, you'll risk the beans cooking unevenly or even scorching.
Add the Fast-Cooking Beans First
Begin by adding the quickest-cooking beans to the simmering water. This includes the 0.2 cup split peas (yellow), 0.2 cup split peas (green), 0.1 cup mung beans, and 0.1 cup lentils (green). These varieties typically cook in about 20-30 minutes, so they'll be ready before the larger beans.
Stir gently to prevent the beans from sticking to the bottom of the pot. You'll notice the water will become slightly cloudy as the beans release starches. This is normal and actually contributes to the soup's body. Keep the heat at a gentle simmer - too vigorous a boil can cause the beans to break apart and turn mushy.
Gradually Add the Remaining Beans
After 25 minutes of simmering, add the slightly slower-cooking beans: 0.25 cup chickpeas, 0.25 cup navy beans, 0.25 cup pinto beans, 0.2 cup great northern beans, 0.15 cup adzuki beans, 0.15 cup black-eyed peas, 0.1 cup borlotti beans, and 0.1 cup cannellini beans. These will need about 45-60 minutes total cooking time.
Don't add all the beans at once - this prevents the faster-cooking varieties from becoming overdone while waiting for the larger beans to finish. About 15 minutes after adding these, incorporate the 0.5 cup black beans and 0.5 cup kidney beans. These heartier beans will take the full 60-75 minutes to become tender.
Season and Simmer to Perfection
Continue simmering the soup for a total of 75 minutes from when you first added the water. The beans are done when they're tender but still hold their shape - you should be able to pierce them easily with a fork, but they shouldn't be falling apart. Taste one of each bean type to ensure they're all properly cooked.
Remove the bay leaves and discard them. Season the soup with salt to taste - I usually add about 1 teaspoon at this stage, but adjust based on your preference. The natural flavors of the beans should shine through, but you might want to add a splash of lemon juice or a pinch of red pepper flakes for brightness if desired. Let the soup sit off heat for 10 minutes before serving - this allows the flavors to meld completely.
Pro Tips For Making 18 Bean Soup Mix
- SOAK DRY BEANS FIRST: I learned this the hard way—skipping the soak with navy beans and chickpeas turns your soup into a mushy, gummy mess. Give them 8–12 hours in cold water (or a quick 2-hour soak in hot water), then rinse well before cooking. The lentils and black beans can skip this, but don’t cut corners on the harder beans.
- SIMMER, DON’T BOIL: Your beans will fall apart if you let the soup boil hard. Once everything’s in the pot, bring it to a gentle simmer (tiny bubbles, just breaking the surface) and keep it there. I used to rush this, and the soup ended up grainy—now I set a timer and check the heat every 10 minutes.
- SKIP THE SALT UNTIL LATER: Adding salt early hardens the beans, especially those tough navy and kidney varieties. Wait until the last 30 minutes of cooking to season, or your soup will turn out bland and chewy. Trust me, the flavor will still be there—you’re just letting the beans soften properly first.
- STIR IN THE LENTILS LAST: Green lentils cook faster than the rest, so add them 15–20 minutes before the soup’s done. I was skeptical until I tried it—they stay intact and hold their shape instead of turning to mush. If you add them early, they’ll dissolve into the broth like overcooked pasta.
Common mistakes when making this dish
Skipping the Soak
One of the biggest mistakes is skipping the soaking step entirely. While you can cook dried beans without soaking, this mix includes a variety of beans with different cooking times. Soaking for at least 8 hours (or overnight) ensures even cooking and prevents some beans from becoming mushy while others stay hard. I always soak mine in a large bowl with cold water and a pinch of salt—this helps remove anti-nutrients and speeds up cooking time. If you're short on time, a quick soak of 2 hours in boiling water works too. 💡
Uneven Bean Distribution
Another common error is combining all beans at once, which leads to uneven textures. The mix includes fast-cooking split peas alongside slow-cooking black beans, so they need to be added in stages. I recommend adding the quickest beans first (like lentils and split peas) and the larger beans later. This prevents some varieties from becoming overcooked while others remain underdone. A timer or kitchen schedule helps track when to add each batch. 🕒
Overcrowding the Pot
Using a pot that's too small forces beans to compete for space, leading to uneven cooking and potential scorching. Always use a pot that's at least 2-3 times larger than your bean volume. I like to use a 6-8 quart Dutch oven for this mix—it provides enough room for the beans to expand and simmer gently without sticking. If your pot is too small, cook the beans in batches or use a larger pot. 🍲
Ignoring Water Levels
Many recipes fail because they don’t account for the beans absorbing water as they cook. Start with 12 cups of water per 1 tablespoon of mix—this ensures enough liquid to create a hearty soup without needing to add more later. If the water level drops too low, the beans will stick and burn. Keep a close eye on the pot and add hot water as needed to maintain the simmer. 💧
Forgetting to Taste and Adjust
After cooking, some people skip the final seasoning step, assuming the beans alone will provide enough flavor. While the mix includes garlic powder and onion flakes, you’ll likely need to add salt, pepper, or acid (like lemon juice) to balance the flavors. Taste the soup before serving—this is the only way to ensure it’s perfectly seasoned. I always add a pinch of smoked paprika for depth if the soup feels flat. 🌶️
Storing Improperly
Leaving the mix exposed to air or moisture after cooking can lead to spoilage. Always store the cooked soup in an airtight container and refrigerate within 2 hours of cooking. For longer storage, freeze portions in glass jars or silicone molds—they reheat better than plastic. Label the container with the date to track freshness. The mix itself (uncooked) keeps for 6 months in a cool, dark place, but cooked soup should be eaten within 5 days for best quality. ❄️
Nutrition facts
Frequently asked questions
Can I use canned beans instead of dried in this mix?
You can absolutely substitute canned beans for convenience! Drain and rinse 1 cup of canned beans to equal 0.25 cup dried beans by volume. Keep the same bean types for best texture, but avoid using canned beans with added salt or preservatives. For the most authentic flavor, dried beans develop richer depth when cooked from scratch.
How do I adjust this mix for a pressure cooker?
For a 6-quart electric pressure cooker, use 1 tablespoon of mix per 1 cup of water. Add all beans at once with 12 cups water, then cook on high pressure for 20 minutes after the initial pressure builds. Quick-release the pressure and check for doneness—some beans may need 5-10 extra minutes if they're undercooked. Always follow your specific cooker's safety guidelines.
What's the best way to store the uncooked mix?
Store your dry mix in an airtight glass jar or vacuum-sealed bag in a cool, dark pantry. The spices help preserve freshness, so it'll stay good for 6-12 months. For longer storage, freeze the mix in 1-tablespoon portions in silicone molds—this prevents moisture absorption and keeps it fresh indefinitely. Label with the date to track freshness.
Can I make this mix without some of the harder-to-find beans?
This mix is designed to be flexible. If you're missing borlotti or adzuki beans, simply increase the amount of black beans or kidney beans by the same volume. The key is maintaining variety—aim for at least 5-6 different bean types to get the best texture contrast. The garlic powder and onion flakes will compensate for any flavor gaps.
How much of this mix should I use per serving?
For a standard 1.5-cup soup serving, use 1 tablespoon of mix (about 15g). This makes a hearty portion when combined with 1 cup broth or water. For a 4-serving batch, use 4 tablespoons of mix with 4 cups liquid. The mix is highly concentrated, so you'll need to add vegetables, herbs, or additional seasoning to complete your soup.